

§Your first Play application
Let’s write a simple to do list application with Play 2.0 and deploy it to the cloud.
§Prerequisites
First of all, make sure that you have a working Play installation. You only need Java (version 6 minimum), and to unzip the Play binary package to start; everything is included.
As we will use the command line a lot, it’s better to use a Unix-like OS. If you run a Windows system, it will also work fine; you’ll just have to type a few commands in the command prompt.
You will of course need a text editor. You can also use a Scala IDE such as Eclipse or IntelliJ if you like. However, with Play you can have fun working with a simple text editor like Textmate, Emacs or vi. This is because the framework manages the compilation and the deployment process itself.
§Project creation
Now that Play is correctly installed, it’s time to create the new application. Creating a Play application is pretty easy and fully managed by the Play command line utility. That allows for standard project layouts between all Play applications.
On the command line type:
$ play new todolist
It will prompt you for a few questions. Select the Create a simple Scala application project template.
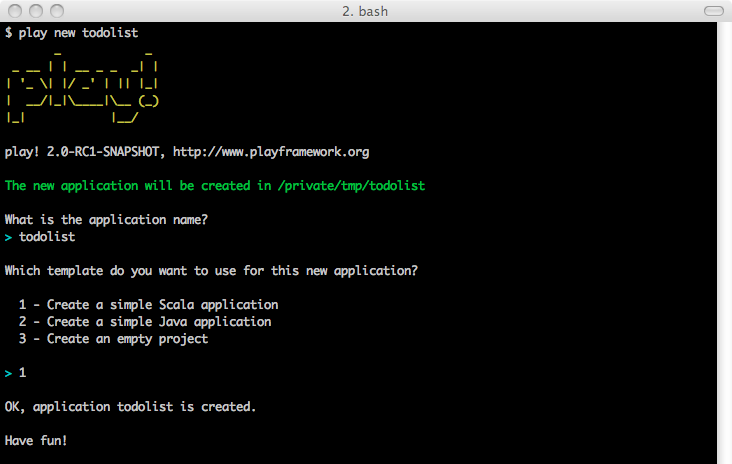
The play new command creates a new directory todolist/ and populates it with a series of files and directories, the most important being:
app/contains the application’s core, split between models, controllers and views directories. This is the directory where .scala source files live.conf/contains all the application’s configuration files, especially the mainapplication.conffile, theroutesdefinition files and themessagesfiles used for internationalization.projectcontains the build scripts. The build system is based on sbt. But a new Play application comes with a default build script that will just work fine for our application.public/contains all the publicly available resources, which includes JavaScript, stylesheets and images directories.test/contains all the application tests. Tests are written as Specs2 specifications.
Because Play uses UTF-8 as single encoding, it’s very important that all text files hosted in these directories are encoded using this charset. Make sure to configure your text editor accordingly.
§Using the Play console
Once you have an application created, you can run the Play console. Go to the new todolist/ directory and run:
$ play
This launches the Play console. There are several things you can do from the Play console, but let’s start by running the application. From the console prompt, type run:
[todolist] $ run
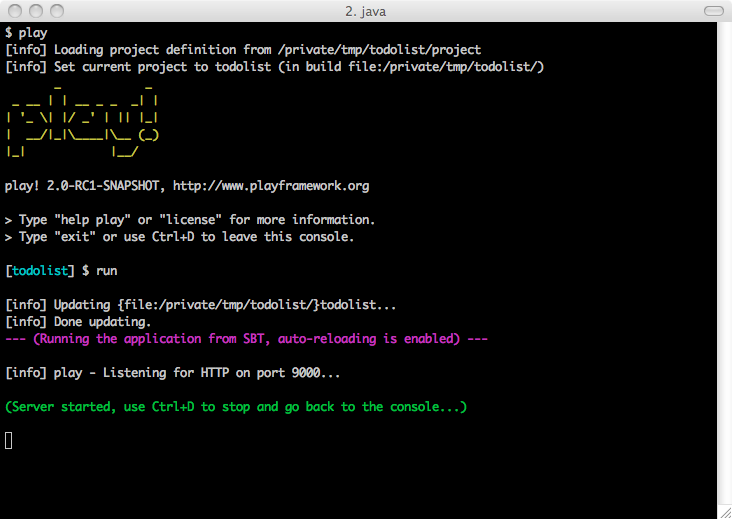
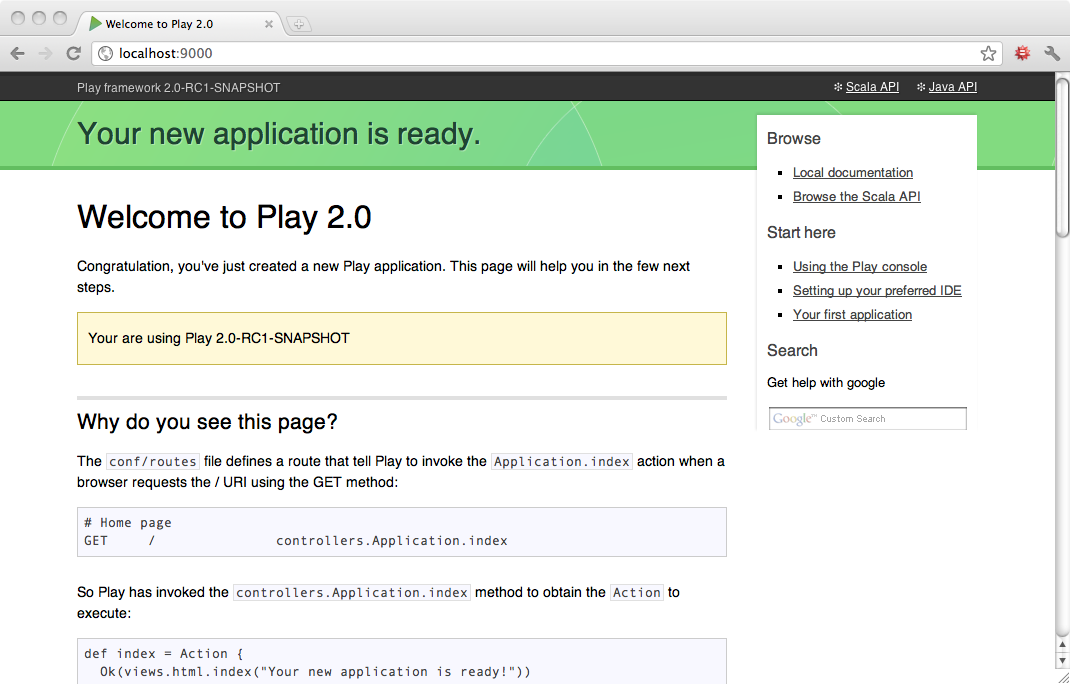
The application is now running in development mode. Open a browser at http://localhost:9000/:
Note: Read more about The Play Console.
§Overview
Let’s see how the new application can display this page.
The main entry point of your application is the conf/routes file. This file defines all of the application’s accessible URLs. If you open the generated routes file you will see this first route:
GET / controllers.Application.index
That simply tells Play that when the web server receives a GET request for the / path, it must retrieve the Action to execute from the controllers.Application.index method.
Let’s see how the controllers.Application.index method looks like. Open the todolist/app/controllers/Application.scala source file:
package controllers

import play.api._
import play.api.mvc._

object Application extends Controller {

  def index = Action {
    Ok(views.html.index("Your new application is ready."))
  }

}
You see that controllers.Application.index returns an Action that will handle the request. An Action must return a Result that represents the HTTP response to send back to the web browser.
Note: Read more about Actions.
Here the action returns a 200 OK response filled with HTML content. The HTML content is provided by a template. Play templates are compiled to standard Scala functions, here as views.html.index(message: String).
This template is defined in the app/views/index.scala.html source file:
@(message: String)

@main("Welcome to Play 2.0") {

    @play20.welcome(message)

}
The first line defines the function signature. Here it takes a single String parameter. Then the template content mix HTML (or any text based language) with Scala statements. The Scala statements starts with the special @ character.
§Development workflow
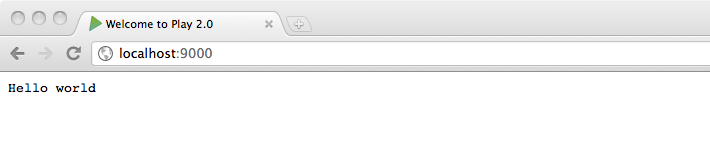
Now let’s make some modifications to the new application. In the Application.scala change the content of the response:
def index = Action {
  Ok("Hello world")
}
With this change the index action will now respond with a simple text/plain Hello world response. To test this change, just refresh the home page in your browser:
There is no need to compile the code yourself or restart the server to see the modification. It is automatically reloaded when a change is detected. But what happens when you make a mistake in your code?
Let’s try:
def index = Action {
  Ok("Hello world)
}
Now reload the home page in your browser:
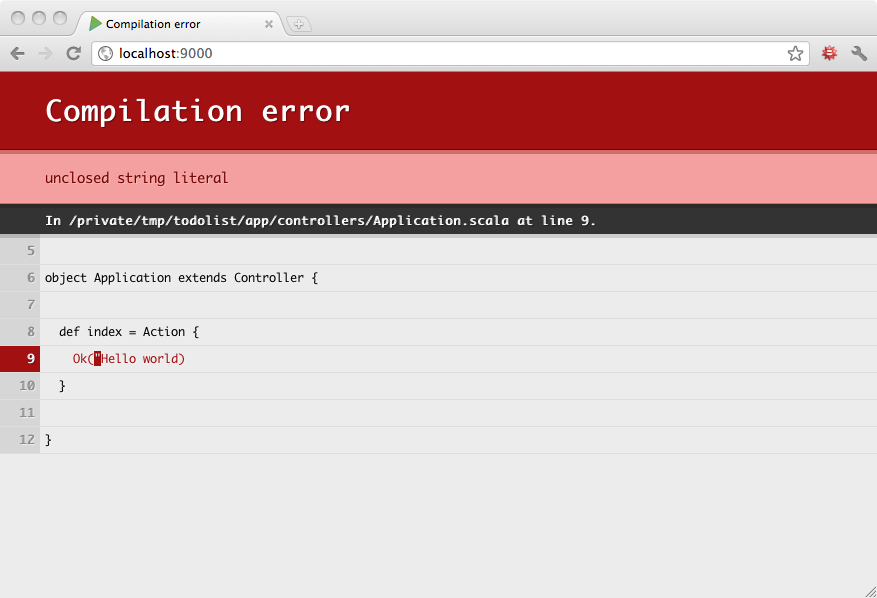
As you see errors are beautifully displayed directly in your browser.
§Preparing the application
For our to do list application, we need a few actions and the corresponding URLs. Let’s start by defining the routes.
Edit the conf/routes file:
# Home page
GET     /                       controllers.Application.index

# Tasks
GET     /tasks                  controllers.Application.tasks
POST    /tasks                  controllers.Application.newTask
POST    /tasks/:id/delete       controllers.Application.deleteTask(id: Long)
We create a route to list all tasks, and a couple of others to handle task creation and deletion. The route to handle task deletion defines a variable argument id in the URL path. This value is then passed to the deleteTask method that will create the Action.
Now if you reload in your browser, you will see that Play cannot compile your routes file:
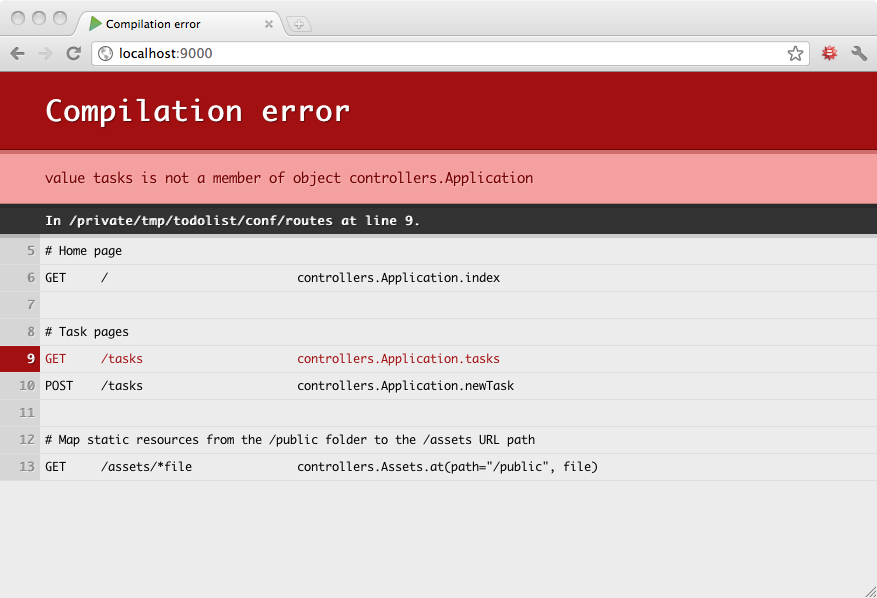
This is because the new routes reference non-existent action methods. So let’s add them to the Application.scala file:
object Application extends Controller {

  def index = Action {
    Ok("Hello world")
  }

  def tasks = TODO

  def newTask = TODO

  def deleteTask(id: Long) = TODO

}
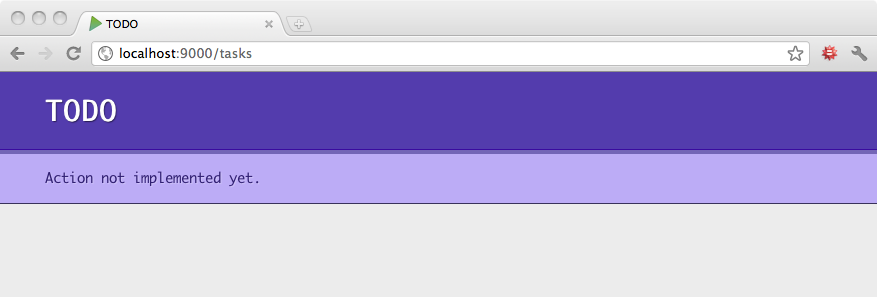
As you see we use TODO to define our action implementations. Because we don’t want to write the action implementations yet, we can use the built-in TODO action that will return a 501 Not Implemented HTTP response.
You can try to access the http://localhost:9000/tasks to see that:
Now the last thing we need to fix before starting the action implementation is the index action. We want it to automatically redirect to the tasks list page:
def index = Action {
  Redirect(routes.Application.tasks)
}
As you can see, we use Redirect instead of Ok to specify a 303 See Other HTTP response type. We also use the reverse router to get the URL needed to fetch the tasks actions.
Note: Read more about the Router and reverse router.
§Prepare the Task model
Before continuing the implementation we need to define what a Task looks like in our application. Create a case class for it in the app/models/Task.scala file:
package models

case class Task(id: Long, label: String)

object Task {

  def all(): List[Task] = Nil

  def create(label: String) {}

  def delete(id: Long) {}

}
We have also created a companion object to manage Task operations. For now we wrote a dummy implementation for each operation, but later in this tutorial we will write implementations that store the tasks in a relational database.
§The application template
Our simple application will use a single web page that shows both the tasks list and the task creation form. Let’s modify the index.scala.html template for that:
@(tasks: List[Task], taskForm: Form[String])

@import helper._

@main("Todo list") {

    <h1>@tasks.size task(s)</h1>

    <ul>
        @tasks.map { task =>
            <li>
                @task.label

                @form(routes.Application.deleteTask(task.id)) {
                    <input type="submit" value="Delete">
                }
            </li>
        }
    </ul>

    <h2>Add a new task</h2>

    @form(routes.Application.newTask) {

        @inputText(taskForm("label"))

        <input type="submit" value="Create">

    }

}
We changed the template signature to take two parameters:
- a list of tasks to display
- a task form.
We also imported helper._ that gives us the form creation helpers, typically the form function, which creates an HTML <form> with filled action and method attributes, and the inputText function that creates an HTML input for a form field.
Note: Read more about the Templating system and Forms helper.
§The task form
A Form object encapsulates an HTML form definition, including validation constraints. Let’s create a very simple form in the Application controller: we only need a form with a single label field. The form will also check that the label provided by the user is not empty:
import play.api.data._
import play.api.data.Forms._

val taskForm = Form(
  "label" -> nonEmptyText
)
The type of taskForm is then Form[String] since it is a form generating a simple String. You also need to import some play.api.data classes.
Note: Read more about the Form definitions.
§Rendering the first page
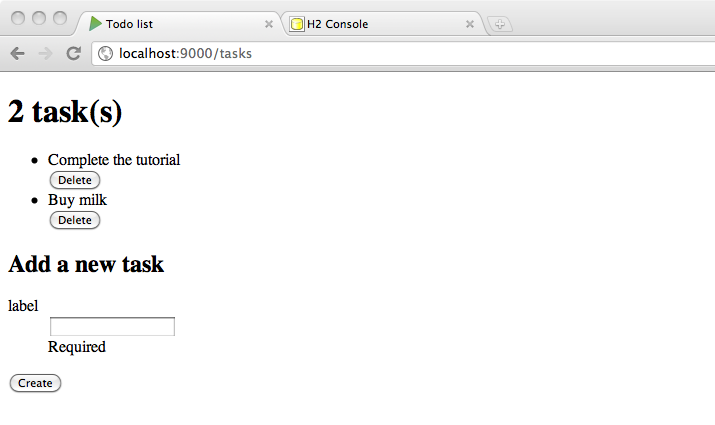
Now we have all elements needed to display the application page. Let’s write the tasks action:
import models.Task

def tasks = Action {
  Ok(views.html.index(Task.all(), taskForm))
}
This renders a 200 OK result filled with the HTML rendered by the index.scala.html template called with the tasks list and the task form.
You can now try to access http://localhost:9000/tasks in your browser:
![]()
§Handling the form submission
For now, if we submit the task creation form, we still get the TODO page. Let’s write the implementation of the newTask action:
def newTask = Action { implicit request =>
  taskForm.bindFromRequest.fold(
    errors => BadRequest(views.html.index(Task.all(), errors)),
    label => {
      Task.create(label)
      Redirect(routes.Application.tasks)
    }
  )
}
To fill the form we need to have the request in the scope, so it can be used by bindFromRequest to create a new form filled with the request data. If there are any errors in the form, we redisplay it (here we use 400 Bad Request instead of 200 OK). If there are no errors, we create the task and then redirect to the task list.
Note: Read more about the Form submissions.
§Persist the tasks in a database
It’s now time to persist the tasks in a database to make the application useful. Let’s start by enabling a database in our application. In the conf/application.conf file, add:
db.default.driver=org.h2.Driver
db.default.url="jdbc:h2:mem:play"
For now we will use a simple in memory database using H2. No need to restart the server, refreshing the browser is enough to set up the database.
We will use Anorm in this tutorial to query the database. First we need to define the database schema. Let’s use Play evolutions for that, so create a first evolution script in conf/evolutions/default/1.sql:
# Tasks schema

# --- !Ups

CREATE SEQUENCE task_id_seq;
CREATE TABLE task (
    id integer NOT NULL DEFAULT nextval('task_id_seq'),
    label varchar(255)
);

# --- !Downs

DROP TABLE task;
DROP SEQUENCE task_id_seq;
Now if you refresh your browser, Play will warn you that your database needs evolution:
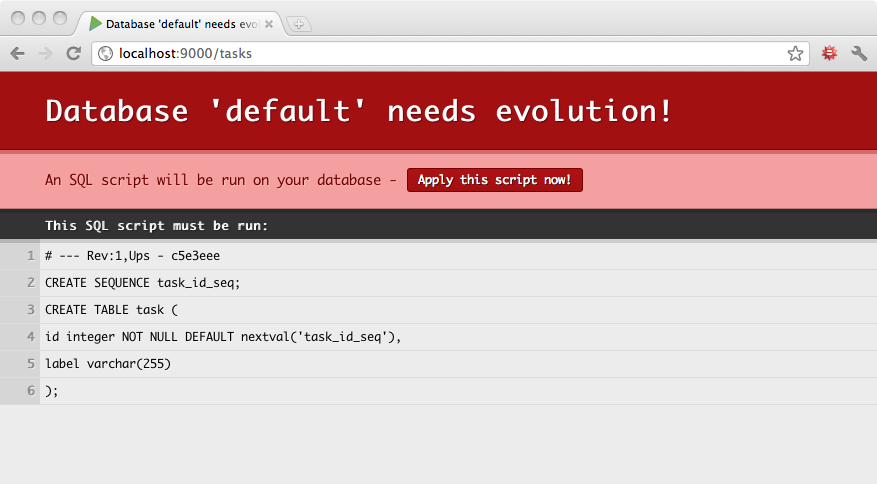
Just click the Apply script button to run the script. Your database schema is now ready!
Note: Read more about Evolutions.
It’s now time to implement the SQL queries in the Task companion object, starting with the all() operation. Using Anorm we can define a parser that will transform a JDBC ResultSet row to a Task value:
import anorm._
import anorm.SqlParser._

val task = {
  get[Long]("id") ~
  get[String]("label") map {
    case id~label => Task(id, label)
  }
}
Here, task is a parser that, given a JDBC ResultSet row with at least an id and a label column, is able to create a Task value.
We can now use this parser to write the all() method implementation:
import play.api.db._
import play.api.Play.current

def all(): List[Task] = DB.withConnection { implicit c =>
  SQL("select * from task").as(task *)
}
We use the Play DB.withConnection helper to create and release automatically a JDBC connection.
Then we use the Anorm SQL method to create the query. The as method allows to parse the ResultSet using the task * parser: it will parse as many task rows as possible and then return a List[Task] (since our task parser returns a Task).
It’s time to complete the implementation:
def create(label: String) {
  DB.withConnection { implicit c =>
    SQL("insert into task (label) values ({label})").on(
      'label -> label
    ).executeUpdate()
  }
}

def delete(id: Long) {
  DB.withConnection { implicit c =>
    SQL("delete from task where id = {id}").on(
      'id -> id
    ).executeUpdate()
  }
}
Now you can play with the application; creating new tasks should work.
Note: Read more about Anorm.
§Deleting tasks
Now that we can create tasks, we need to be able to delete them. Very simple: we just need to finish the implementation of the deleteTask action:
def deleteTask(id: Long) = Action {
  Task.delete(id)
  Redirect(routes.Application.tasks)
}
§Deploying to Heroku
All features are complete, so it’s time to deploy our application to production. Let’s deploy it to Heroku. First, you need to create a Procfile for Heroku. Create the Procfile in the root application directory:
web: target/start -Dhttp.port=${PORT} -DapplyEvolutions.default=true -Ddb.default.url=${DATABASE_URL} -Ddb.default.driver=org.postgresql.Driver
Note: Read more about Deploying to Heroku.
We use system properties to override the application configuration, when running on Heroku. Since Heroku provides a PostgreSQL database, we need to add the required driver to our application dependencies.
Specify it into the project/Build.scala file:
val appDependencies = Seq(
  "postgresql" % "postgresql" % "8.4-702.jdbc4"
)
Note: Read more about Dependencies management.
Heroku uses git to deploy your application. Let’s initialize the git repository:
$ git init
$ git add .
$ git commit -m "init"
Now we can create the application on Heroku:
$ heroku create --stack cedar

Creating warm-frost-1289... done, stack is cedar
http://warm-1289.herokuapp.com/ | [email protected]:warm-1289.git
Git remote heroku added
And then deploy it using simple git push heroku master:
$ git push heroku master

Counting objects: 34, done.
Delta compression using up to 8 threads.
Compressing objects: 100% (20/20), done.
Writing objects: 100% (34/34), 35.45 KiB, done.
Total 34 (delta 0), reused 0 (delta 0)

-----> Heroku receiving push
-----> Scala app detected
-----> Building app with sbt v0.11.0
-----> Running: sbt clean compile stage
       ...
-----> Discovering process types
       Procfile declares types -> web
-----> Compiled slug size is 46.3MB
-----> Launching... done, v5
       http://8044.herokuapp.com deployed to Heroku

To [email protected]:floating-lightning-8044.git
* [new branch]      master -> master
Heroku will build your application and deploy it to a node somewhere on the cloud. You can check the state of the application’s processes:
$ heroku ps

Process       State               Command
------------  ------------------  ----------------------
web.1         up for 10s          target/start
It’s started, you can now open it in your browser.
Your first application is now up and running in production!