

§Installing Play
This page shows how to download, install and run a Play application. There’s a built in tutorial that shows you around, so running this Play application will show you how Play itself works!
§Prerequisites
Play requires Java 1.8. To check that you have the latest JDK, please run:
java -version
If you don’t have the JDK, you have to install it from Oracle’s JDK Site.
§Installing Play
Play is a series of libraries available in Maven Repository, so you can use any Java build tool to build a Play project.
For getting started, we’ll install Play through Lightbend Activator.
Activator can be described as “sbt plus templates” – it combines sbt (a build tool) plus a means of downloading project templates (like Maven archetypes) and a web interface for managing those projects. Templates can be examples, or they can be “seed” templates that provide a starting point for your own projects.
Activator comes with a couple of seed templates for Play that we recommend for getting started, play-scala and play-java.
§Downloading Activator
Activator is distributed as a single archive file that expands out to its own subdirectory.
You can download Activator from https://playframework.com/download and click on the “offline distribution” link:
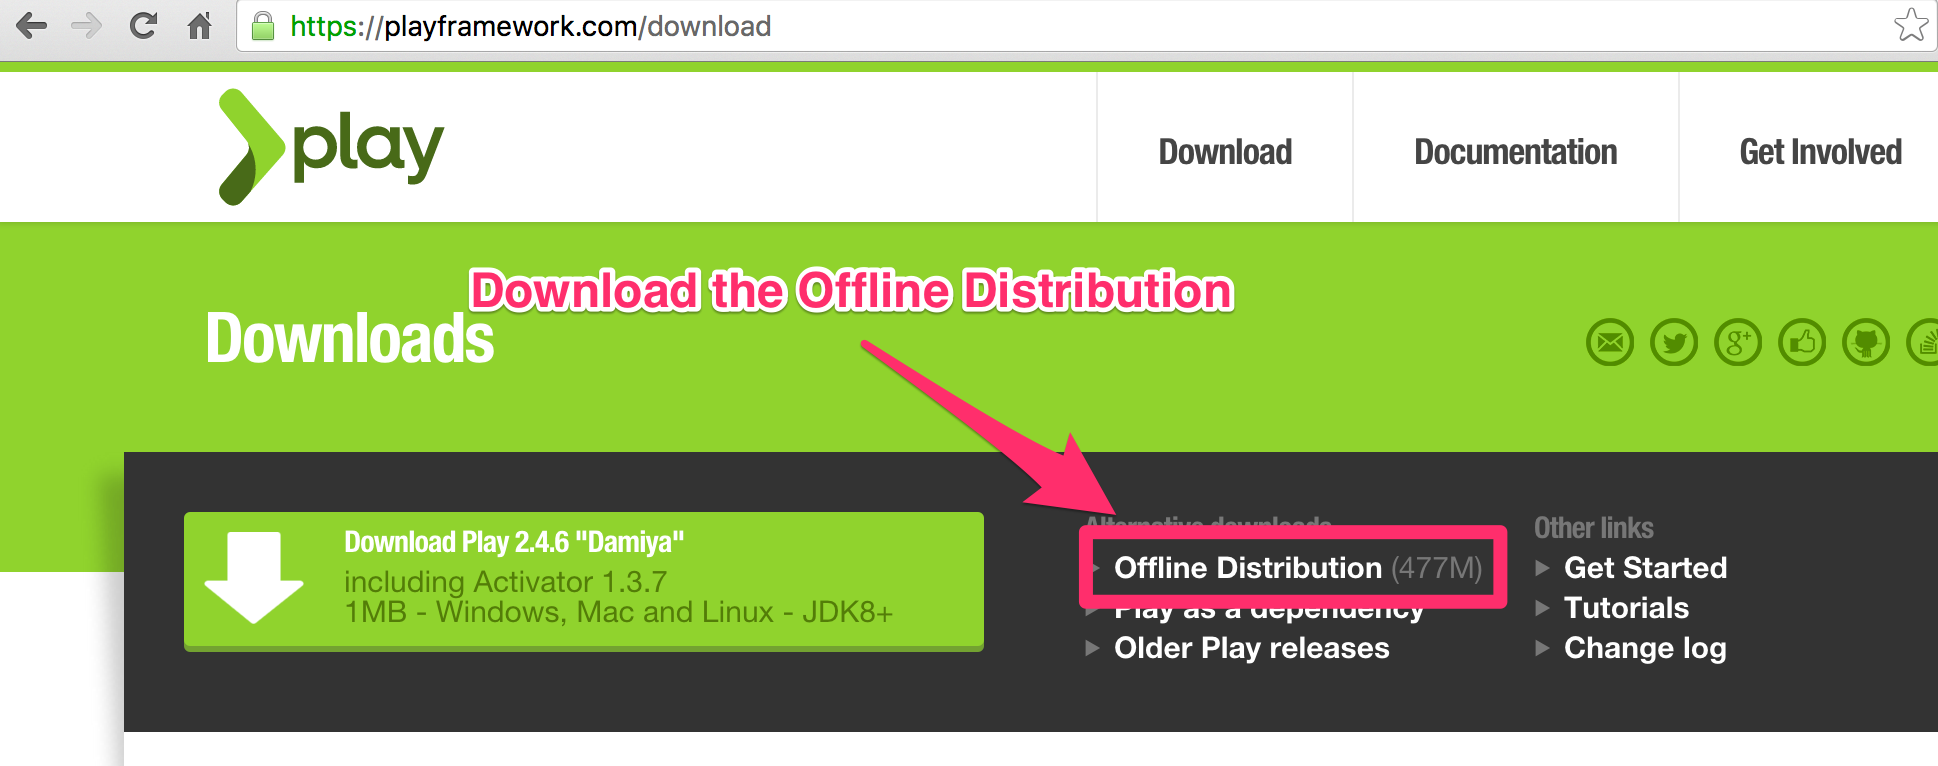
The “offline distribution” comes with all of Activator’s possible dependencies included. It’s a much larger initial download, but installing the offline distribution means that that starting up a new Play project is much faster, as all the dependencies are already resolved.
§Extracting Activator
Extract the archive on a location where you have write access. Running activator writes some files to directories within the distribution, so don’t install to /opt, /usr/local or anywhere else you’d need special permission to write to.
§Adding Activator to your Path
For convenience, you should add the Activator installation directory to your system PATH:
§MacOS / Unix
Add to your login profile. Usually, this is $HOME/.profile:
export PATH=/path/to/activator-x.x.x:$PATH
Make sure that the activator script is executable. If it’s not:
chmod u+x /path/to/activator-x.x.x/activator
§Windows
In a command prompt, type:
setx PATH=%PATH%;"C:\path\to\activator-x.x.x\bin"
Note that setx is only available on Windows 8 or later – before that, and you will have to use the System Properties dialog.
§Create a Project
Activator comes with a couple of different “seeds” that can be used to start off a Play project: play-java and play-scala. You can create a project based off a template either from Activator’s Web Interface, or directly from the command line.
Open a command prompt, and type activator ui to bring up the GUI interface. A browser window will open with the Web UI at http://localhost:8888.
Note: If you’re behind a proxy, make sure to define it with
set HTTP_PROXY=http://<host>:<port>on Windows orexport HTTP_PROXY=http://<host>:<port>on UNIX.
Follow the arrows to create a new project:
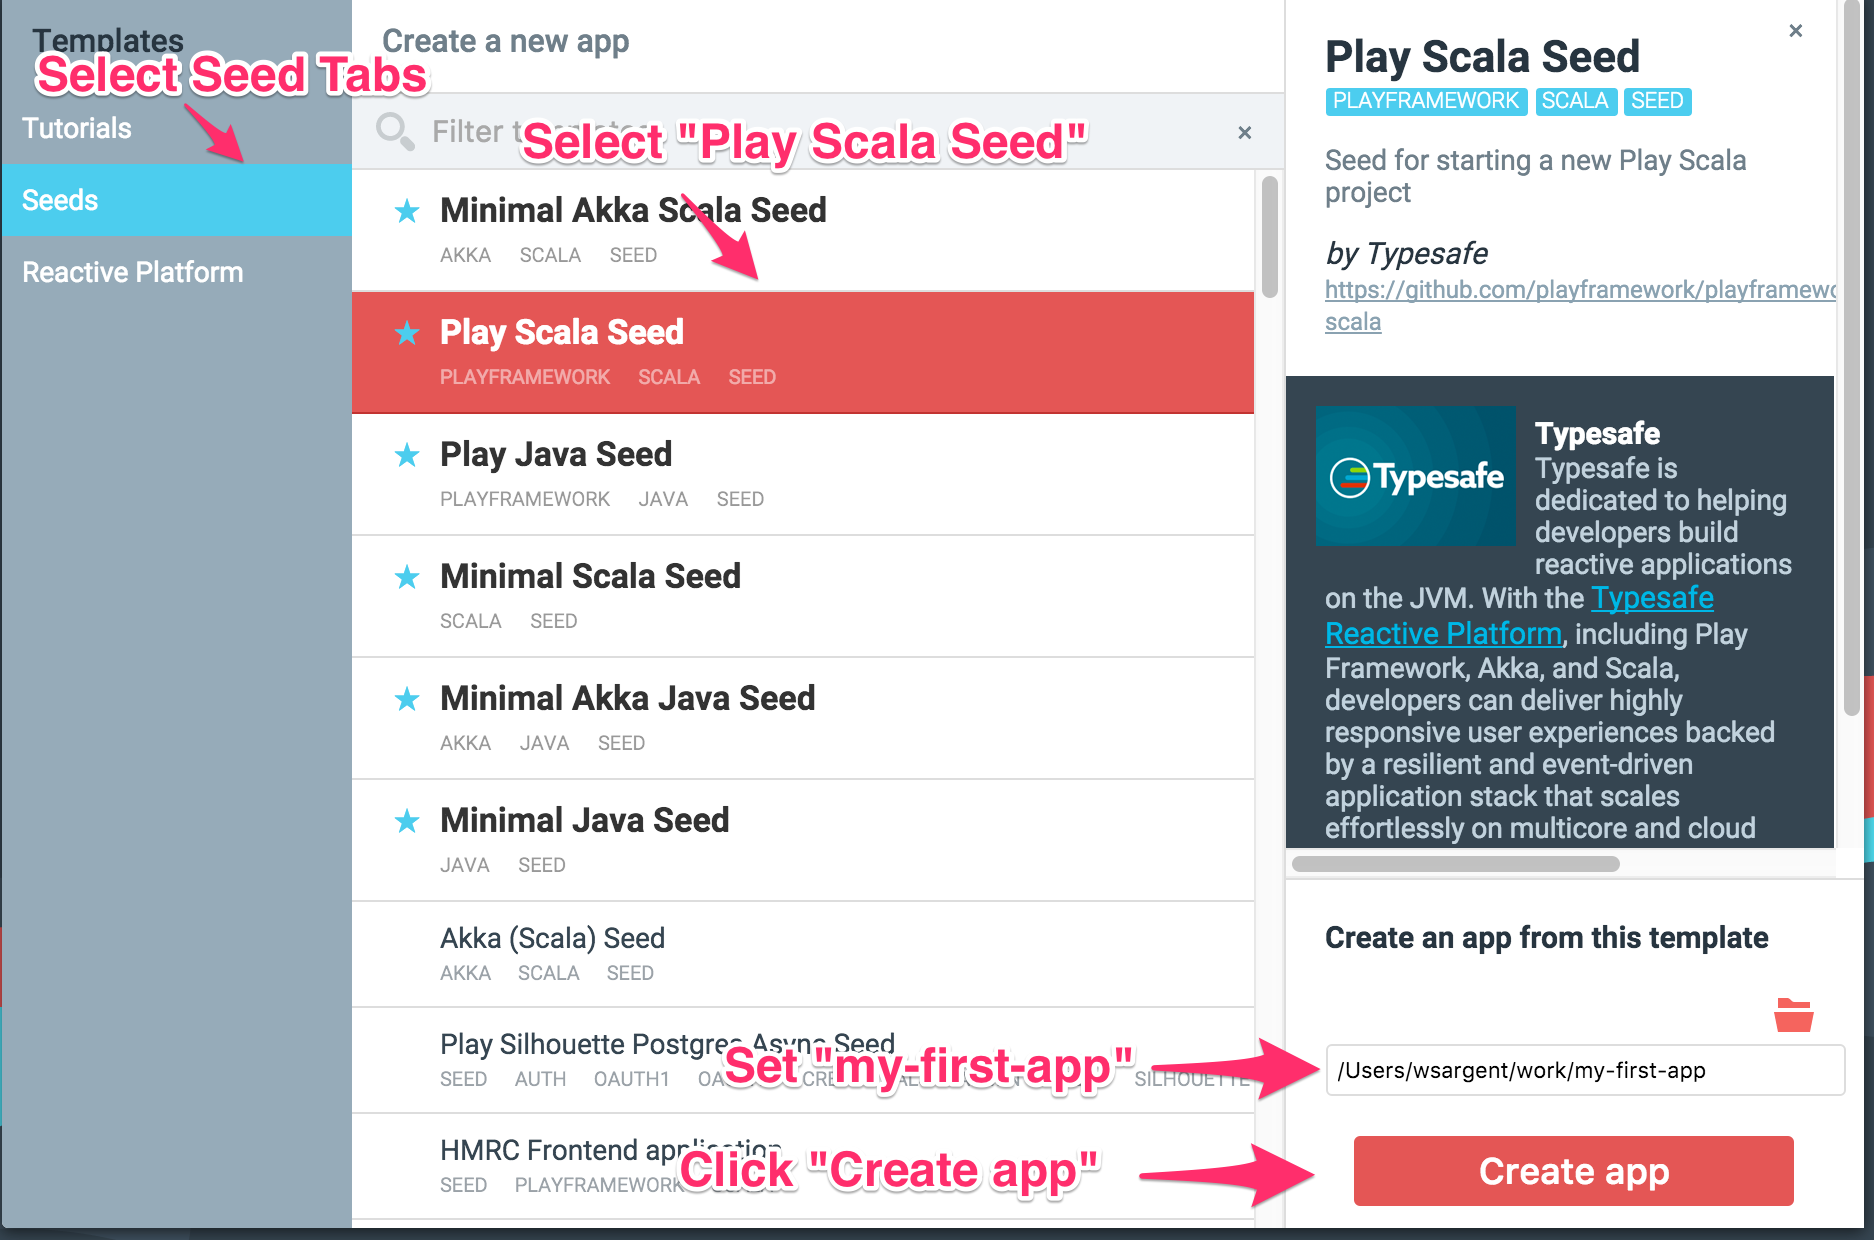
You can read the Activator documentation for more information on how to use the Web Interface.
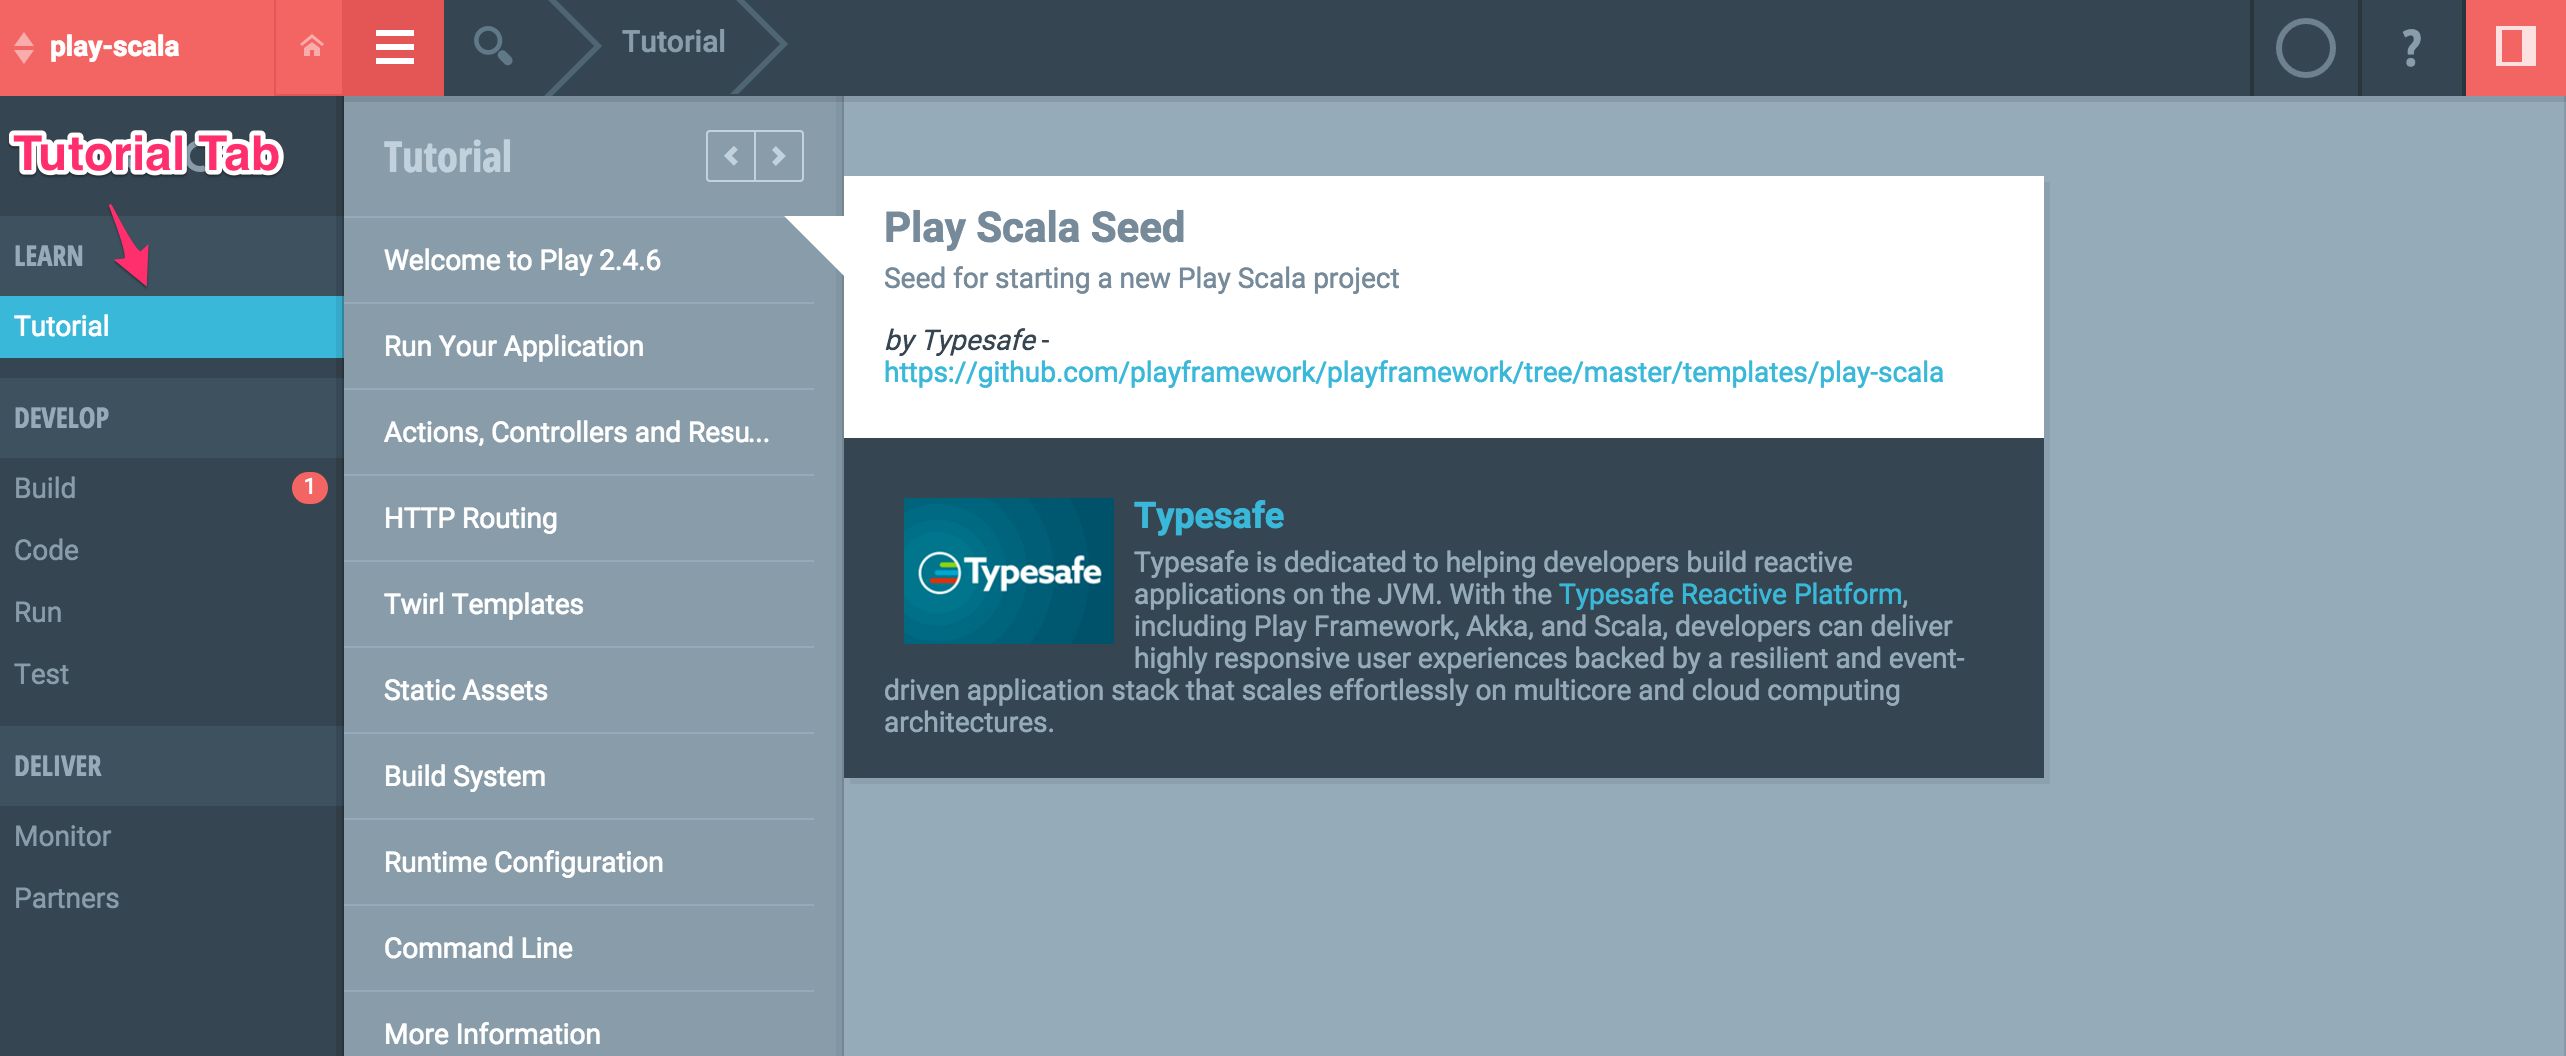
§Accessing the Built-in Tutorial
Activator’s Web Interface contains a built in tutorial section that will walk you through your new application:
§Running Play
Play has an easy to use “development mode” that will let you make changes to code and see your results immediate on the page.
You can run Play in development mode from within Activator’s Web Interface by going to the Run tab and clicking the Run button:
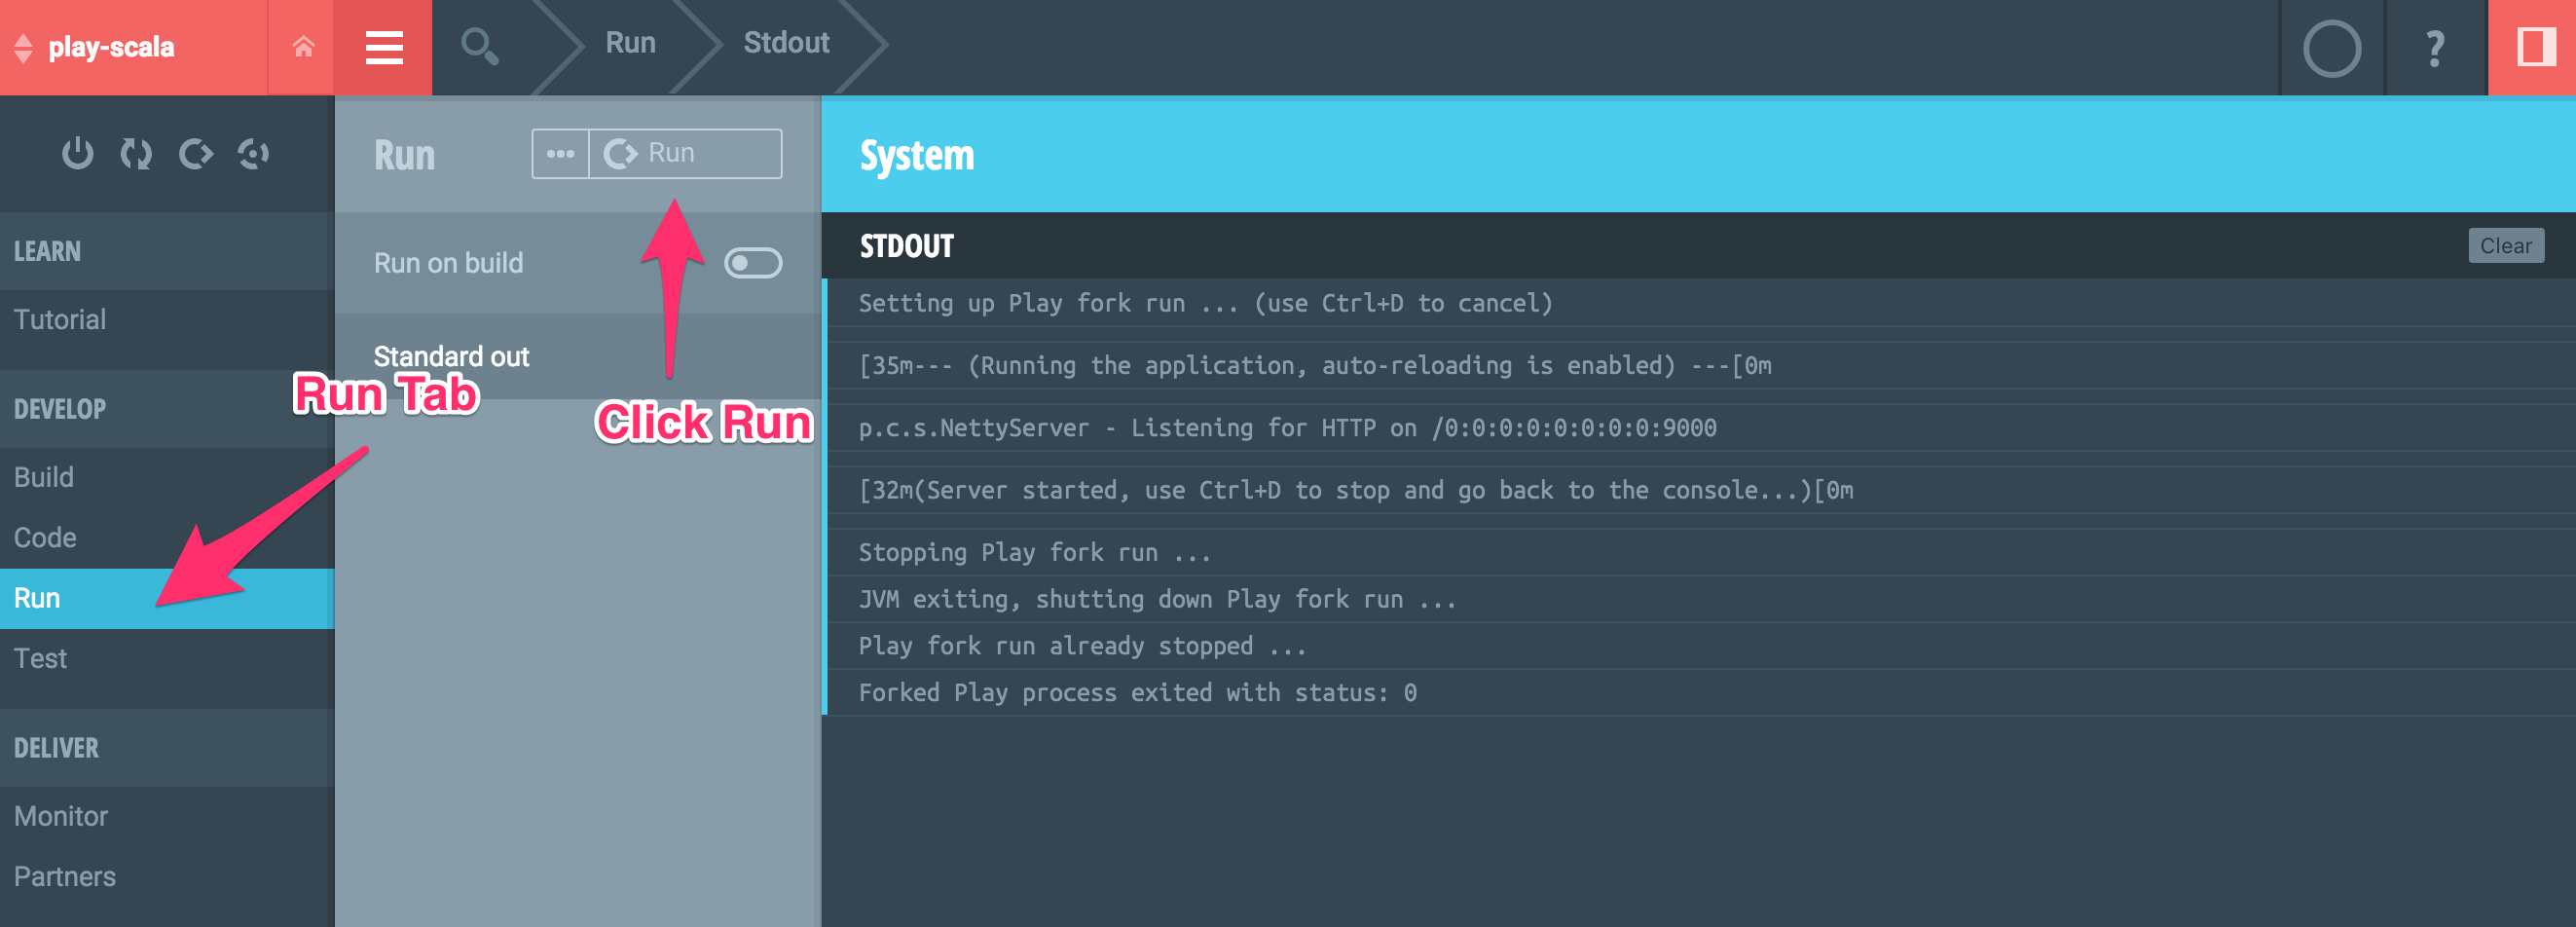
This will bring up the Play application at http://localhost:9000.
§Congratulations!
You are now ready to work with Play! The next page will show you how to create projects from the command line and some more detail about creating new applications.