§スタンドアロンで実行可能なアプリケーションのビルド
§dist タスクを使う
The simplest way to deploy a Play application is to retrieve the source (typically via a git workflow) on the server and to use either activator start or activator stage to start it in place.
その他に、Play のフレームワークに依存しないアプリケーションのバイナリをビルドしたいこともあるでしょう。その場合は、 dist タスクが利用できます。
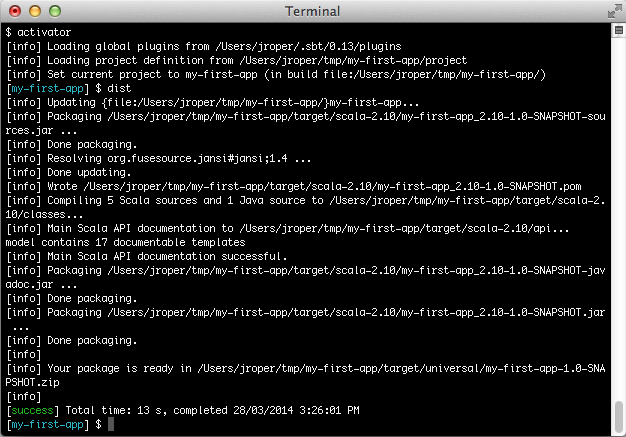
Play コンソールで、 dist を入力してみましょう。
[my-first-app] $ dist
This produces a ZIP file containing all JAR files needed to run your application in the target/universal folder of your application. Alternatively you can run activator dist directly from your OS shell prompt, which does the same thing:
$ activator dist
Windows ユーザー向けの起動スクリプトは拡張子 .bat のファイルとして提供されています。Windows 上で Play アプリケーションを実行する場合は、このファイルを使用してください。
Unix ユーザーのみなさん、zip ファイルは Unix ファイルパーミッションを保持しないので、ファイルを展開したらこの起動スクリプトに実行権限を付与する必要があるでしょう。
$ chmod +x /path/to/bin/<project-name>$ chmod +x /path/to/bin/<project-name>この代わりに tar.gz ファイルを作ることができます。このファイルはパーミッションを保持します。
distタスクの代わりにuniversal:package-zip-tarballタスクを実行してください:play universal:package-zip-tarballactivator universal:package-zip-tarball
By default, the dist task will include the API documentation in the generated package. If this is not necessary, it can be avoided by including this line in build.sbt:
doc in Compile <<= target.map(_ / "none")
For builds with sub-projects, the statement above has to be applied to all sub-project definitions.
§Native Packager
Play は SBT Native Packager プラグイン を使っています。この native packager プラグインは zip ファイルを作る dist タスクを宣言しています。dist タスクを実行することは、以下を実行することとまったく等価です:
$ activator universal:package-bin
この他にも、以下を含む多くの種類のアーカイブを生成することができます。
- tar.gz
- OS X disk images
- Microsoft Installer (MSI)
- RPMs
- Debian packages
- System V / init.d and Upstart services in RPM/Debian packages
もっと詳しい情報は、native packager の ドキュメント をご覧ください。
§Build a server distribution
The sbt-native-packager plugins provides and java_server archetype which enables the following features
- System V or Upstart startup scripts
- Default folders
A full documentation can be found in the documentation.
The java_server archetype is enabled by default, but depending on which package you want to build you have to add a few settings.
§Minimal Debian settings
import com.typesafe.sbt.SbtNativePackager._
import NativePackagerKeys._

maintainer in Linux := "First Lastname <[email protected]>"

packageSummary in Linux := "My custom package summary"

packageDescription := "My longer package description"
Build your package with
play debian:packageBin
§Minimal RPM settings
import com.typesafe.sbt.SbtNativePackager._
import NativePackagerKeys._

maintainer in Linux := "First Lastname <[email protected]>"

packageSummary in Linux := "My custom package summary"

packageDescription := "My longer package description"

rpmRelease := "1"

rpmVendor := "example.com"

rpmUrl := Some("http://github.com/example/server")

rpmLicense := Some("Apache v2")
play rpm:packageBin
There will be some error logging. This is rpm logging on stderr instead of stdout !
§Play PID Configuration
Play manages its own PID, which is described in the Production configuration. In order to tell the startup script where to place the PID file put a file etc-default inside src/templates/ folder and add the following content
-Dpidfile.path=/var/run/${{app_name}}/play.pid
# Add all other startup settings here, too
For a full list of replacements take a closer look at the documentation.
§Maven (または Ivy) レポジトリへパブリッシュする
アプリケーションを Maven レポジトリへパブリッシュすることもできます。パブリッシュされるのは、アプリケーションの JAR と、POM ファイルの二つです。
build.sbt にパブリッシュしたいリポジトリを設定する必要があります:
 publishTo := Some(
   "My resolver" at "http://mycompany.com/repo"
 ),

 credentials += Credentials(
   "Repo", "http://mycompany.com/repo", "admin", "admin123"
 )
設定を記述したら、Play コンソールで publish タスクを実行します。
[my-first-app] $ publish
リゾルバと認証情報の定義に関するさらに詳しい情報については sbt ドキュメント を確認してください。
§Using the SBT assembly plugin
Though not officially supported, the SBT assembly plugin may be used to package and run Play applications. This will produce one jar as an output artifact, and allow you to execute it directly using the java command.
To use this, add a dependency on the plugin to your project/plugins.sbt file:
addSbtPlugin("com.eed3si9n" % "sbt-assembly" % "0.11.2")
Now add the following configuration to your build.sbt:
import AssemblyKeys._

assemblySettings

mainClass in assembly := Some("play.core.server.NettyServer")

fullClasspath in assembly += Attributed.blank(PlayKeys.playPackageAssets.value)
Now you can build the artifact by running activator assembly, and run your application by running:
$ java -jar target/scala-2.XX/<yourprojectname>-assembly-<version>.jar
You’ll need to substitute in the right project name, version and scala version, of course.
Next: 本番環境の設定
このドキュメントの翻訳は Play チームによってメンテナンスされているものではありません。 間違いを見つけた場合、このページのソースコードを ここ で確認することができます。 ドキュメントガイドライン を読んで、お気軽にプルリクエストを送ってください。


