

§Your first Play application
Let’s write a simple task list application with Play 2.0 and deploy it to the cloud. This is a very small example which can be managed in a few hours.
§Prerequisites
First of all, make sure that you have a working Play installation. You only need Java (version 6 minimum), and to unzip the Play binary package to start; everything is included.
As we will use the command line a lot, it’s better to use a Unix-like OS. If you run a Windows system, it will also work fine; you’ll just have to type a few commands in the command prompt.
You will of course need a text editor. If you are used-to a fully-featured Java IDE, such as Eclipse or IntelliJ, you can of course use it. However, with Play you can have fun working with a simple text editor like TextMate, Emacs or vi. This is because the framework manages compilation and the deployment process itself.
§Project creation
Now that Play is correctly installed, it’s time to create the new application. Creating a Play application is pretty easy and fully managed by the Play command line utility. This encourages a standard project layout across all Play applications.
Open a new command line and enter:
$ play new todolist
The Play tool will ask you a few questions. Choose to create a simple Java application project template.
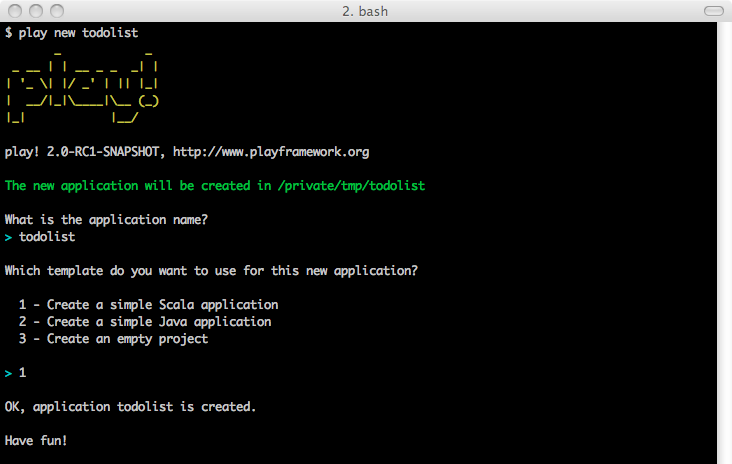
The play new command creates a new directory todolist/ and populates it with a series of files and directories. The most important are as follows.
app/contains the application’s core, split between models, controllers and views directories. This is the directory where .java source files live.conf/contains all the application’s configuration files, especially the mainapplication.conffile, theroutesdefinition files and themessagesfiles used for internationalization.projectcontains the build scripts. The build system is based on sbt. But a new play application comes with a default build script that will just works fine for our application.public/contains all the publicly available resources, which includes JavaScript, stylesheets and images directories.test/contains all the application tests. Tests can be written as JUnit tests.
Because Play uses UTF-8 as the single encoding, it’s very important that all text files hosted in these directories use this encoding. Make sure to configure your text editor accordingly. In the windows system the editor configuration must be ANSI encode
§Using the Play console
Once you have an application created, you can run the Play console. Go to the new todolist/ directory and run:
$ play
This launches the Play console. There are several things you can do from the Play console, but let’s start by running the application. From the console prompt, type run:
[todolist] $ run
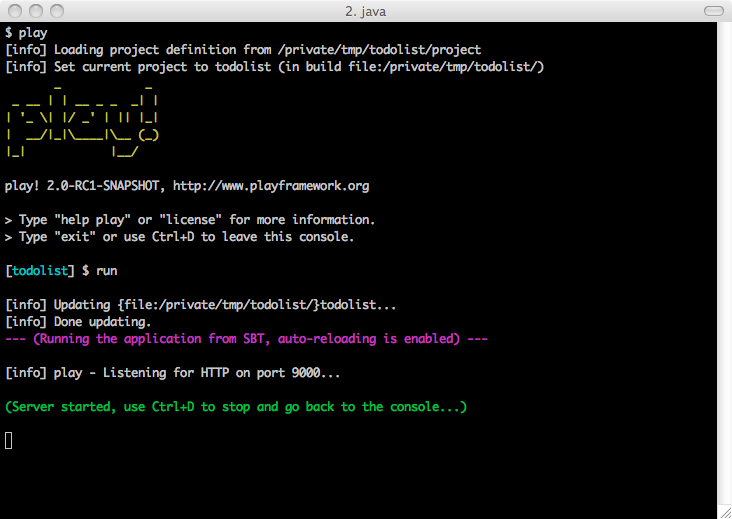
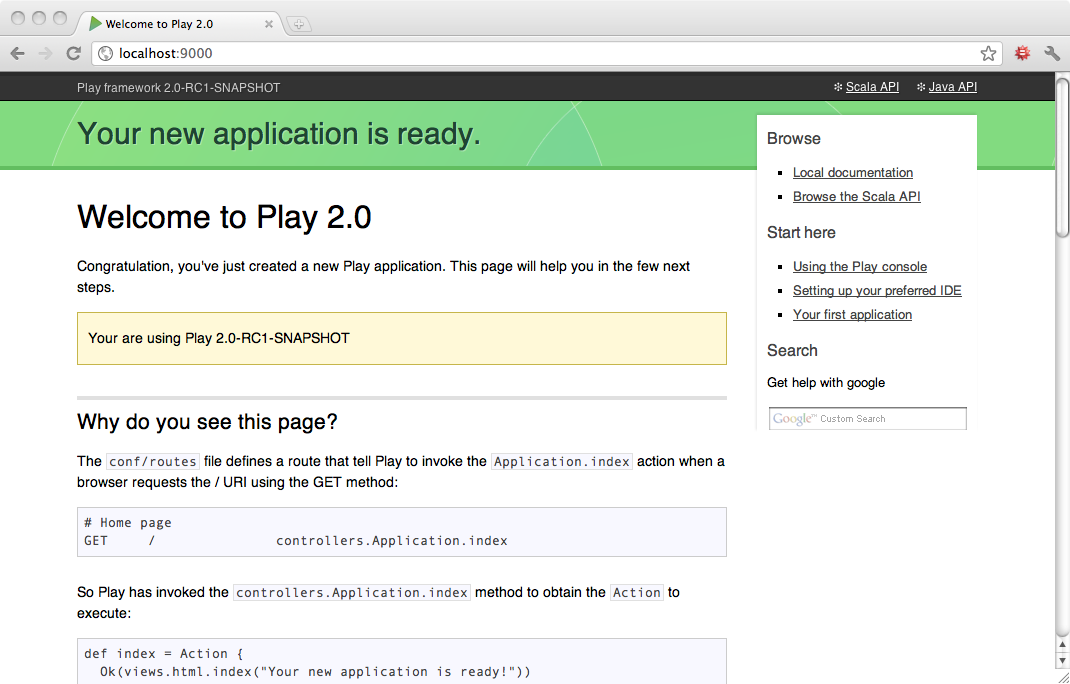
Now the application is running in development mode. Open a browser at http://localhost:9000/:
Note: Read more about The Play Console.
§Overview
Let’s see how the new application can display this page.
The main entry point of your application is the conf/routes file. This file defines all of the application’s accessible URLs. If you open the generated routes file you will see this first route:
GET / controllers.Application.index()
That simply tells Play that when the web server receives a GET request for the / path, it must call the controllers.Application.index() method.
Let’s see what the controllers.Application.index method looks like. Open the todolist/app/controllers/Application.java source file:
package controllers;

import play.*;
import play.mvc.*;

import views.html.*;

public class Application extends Controller {

  public static Result index() {
    return ok(index.render("Your new application is ready."));
  }

}
You see that controllers.Application.index() returns a Result. All action methods must return a Result, which represents the HTTP response to send back to the web browser.
Note: Read more about Actions.
Here, the action returns a 200 OK response with an HTML response body. The HTML content is provided by a template. Play templates are compiled to standard Java methods, here as views.html.index.render(String message).
This template is defined in the app/views/index.scala.html source file:
@(message: String)

@main("Welcome to Play 2.0") {

    @play20.welcome(message)

}
The first line defines the function signature. Here it takes a single String parameter. Then the template content mixes HTML (or any text-based language) with Scala statements. The Scala statements start with the special @ character.
Note: Don’t worry about the template engine using Scala as its expression language. This is not a problem for a Java developer, and you can almost use it as if the language was Java.
§Development work-flow
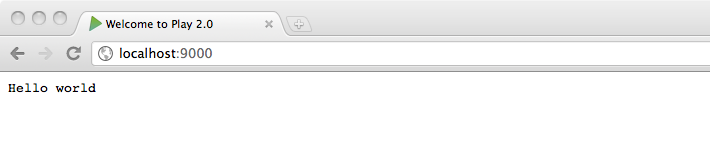
Now let’s make some modifications to the new application. In the Application.java change the content of the response:
public static Result index() {
  return ok("Hello world");
}
With this change, the index action will now respond with a simple text/plain Hello world response. To see this change, just refresh the home page in your browser:
There is no need to compile the code yourself or restart the server to see the modification. It is automatically reloaded when a change is detected. But what happens when you make a mistake in your code? Let’s try:
public static Result index() {
  return ok("Hello world);
}
Now reload the home page in your browser:
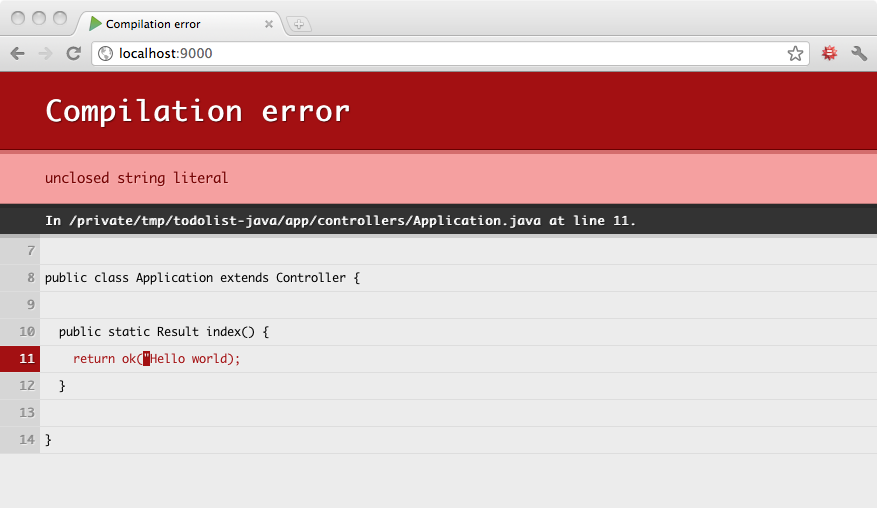
As you can see, errors are beautifully displayed directly in your browser.
§Preparing the application
For our todo list application, we need a few actions and the corresponding URLs. Let’s start by defining the routes.
Edit the conf/routes file:
# Home page
GET     /                       controllers.Application.index()

# Tasks
GET     /tasks                  controllers.Application.tasks()
POST    /tasks                  controllers.Application.newTask()
POST    /tasks/:id/delete       controllers.Application.deleteTask(id: Long)
We create a route to list all tasks, and a couple of others to handle task creation and deletion. The route to handle task deletion defines a variable argument id in the URL path. This value is then passed to the deleteTask action method.
Now if your reload in your browser, you will see that Play cannot compile your routes files:
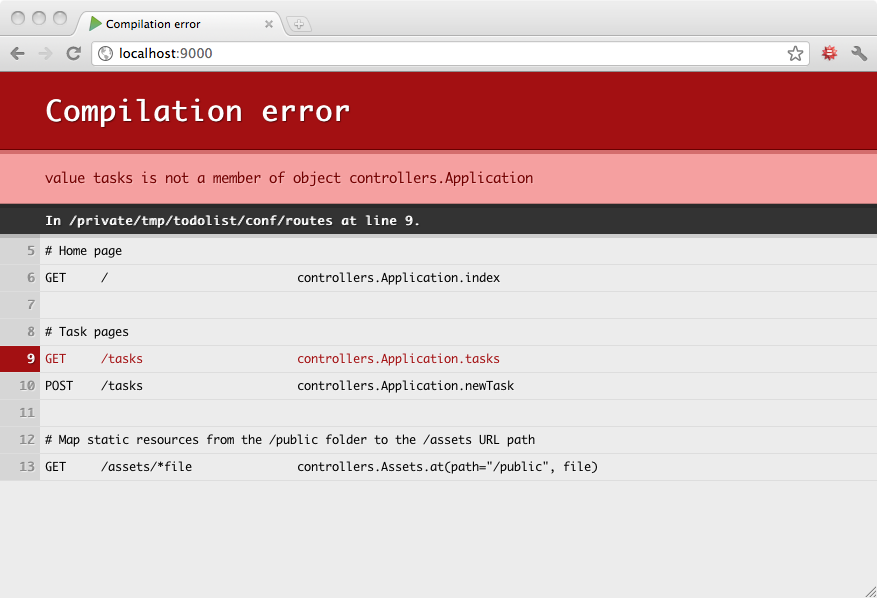
This is because the routes reference non-existent action methods. So let’s add them to the Application.java file:
public class Application extends Controller {

  public static Result index() {
    return ok(index.render("Your new application is ready."));
  }

  public static Result tasks() {
    return TODO;
  }

  public static Result newTask() {
    return TODO;
  }

  public static Result deleteTask(Long id) {
    return TODO;
  }

}
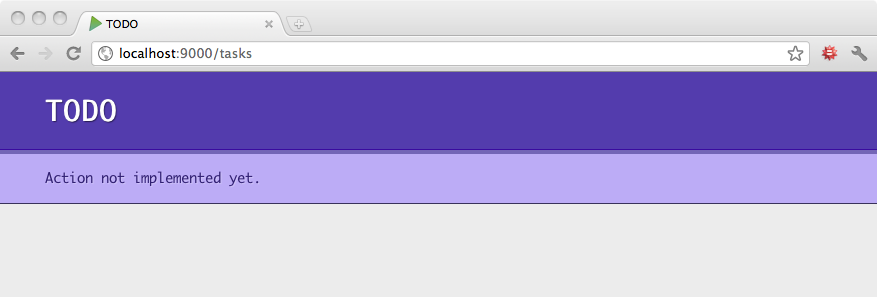
As you see we use TODO as result in our actions implementation. Because we don’t want to write the actions implementation yet, we can use the built-in TODO result that will return a 501 Not Implemented response.
You can try to access the http://localhost:9000/tasks to see that:
Now the last thing we need to fix before starting the action implementation is the index action. We want it to redirect automatically to the tasks list page:
public static Result index() {
  return redirect(routes.Application.tasks());
}
As you see we use redirect instead of ok to specify a 303 See Other response type. We also use the reverse router to get the URL needed to fetch the tasks actions.
Note: Read more about the Router and reverse router.
§Prepare the Task model
Before continuing the implementation we need to define what a Task looks like in our application. Create a class for it in the app/models/Task.java file:
package models;

import java.util.*;

public class Task {

  public Long id;
  public String label;

  public static List<Task> all() {
    return new ArrayList<Task>();
  }

  public static void create(Task task) {
  }

  public static void delete(Long id) {
  }

}
We have also created a bunch of static methods to manage Task operations. For now we wrote dummy implementation for each operation, but later in this tutorial we will write implementations that will store the tasks into a relational database.
§The application template
Our simple application will use a single Web page containing both the tasks list and the task creation form. Let’s modify the index.scala.html template for that:
@(tasks: List[Task], taskForm: Form[Task])

@import helper._

@main("Todo list") {

    <h1>@tasks.size() task(s)</h1>

    <ul>
        @for(task <- tasks) {
            <li>
                @task.label

                @form(routes.Application.deleteTask(task.id)) {
                    <input type="submit" value="Delete">
                }
            </li>
        }
    </ul>

    <h2>Add a new task</h2>

    @form(routes.Application.newTask()) {

        @inputText(taskForm("label"))

        <input type="submit" value="Create">

    }

}
We changed the template signature to take 2 parameters:
- A list of tasks to display
- A task form
We also imported helper._ that give us the form creation helpers, typically the form function that creates the HTML <form> with filled action and method attributes, and the inputText function that creates the HTML input given a form field.
Note: Read more about the Templating system and Forms helper.
§The task form
A Form object encapsulates an HTML form definition, including validation constraints. Let’s create a form for our Task class. Add this to your Application controller:
static Form<Task> taskForm = Form.form(Task.class);
The type of taskForm is then Form<Task> since it is a form generating a simple Task.
You also need to import play.data.* and models.*.
We can add a constraint to the Task type using JSR-303 annotations. Let’s make the label field required:
package models;

import java.util.*;

import play.data.validation.Constraints.*;

public class Task {

  public Long id;

  @Required
  public String label;

  ...
Note: Read more about the Form definitions.
§Rendering the first page
Now we have all elements needed to display the application page. Let’s write the tasks action:
public static Result tasks() {
  return ok(
    views.html.index.render(Task.all(), taskForm)
  );
}
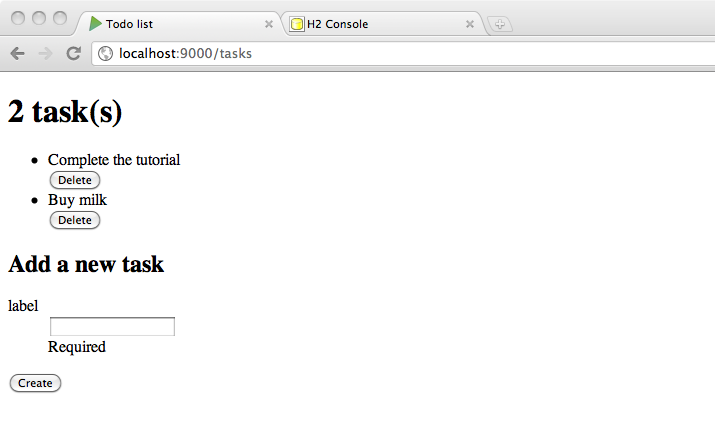
It renders a 200 OK result filled with the HTML rendered by the index.scala.html template called with the tasks list and the task form.
You can now try to access http://localhost:9000/tasks in your browser:
![]()
§Handling the form submission
For now if we submit the task creation form, we still get the TODO page. Let’s write the implementation of the newTask action:
public static Result newTask() {
  Form<Task> filledForm = taskForm.bindFromRequest();
  if(filledForm.hasErrors()) {
    return badRequest(
      views.html.index.render(Task.all(), filledForm)
    );
  } else {
    Task.create(filledForm.get());
    return redirect(routes.Application.tasks());
  }
}
We use bindFromRequest to create a new form filled with the request data. If there are any errors in the form, we redisplay it (here we use 400 Bad Request instead of 200 OK). If there are no errors, we create the task and then redirect to the tasks list.
Note: Read more about the Form submissions.
§Persist the tasks in a database
It’s now time to persist the tasks in a database to make the application useful. Let’s start by enabling a database in our application. In the conf/application.conf file, add:
db.default.driver=org.h2.Driver
db.default.url="jdbc:h2:mem:play"
For now we will use a simple in memory database using H2. No need to restart the server, refreshing the browser is enough to set up the database.
We will use EBean (Play’s default ORM) in this tutorial to query the database. So you’ll have to enable it in the application.conf file as well:
ebean.default="models.*"
By doing this we create an Ebean server connected to the default datasource, managing all entities found in the models package. Now it’s time to transform our Task class to a valid EBean entity:
package models;

import java.util.*;

import play.db.ebean.*;
import play.data.validation.Constraints.*;

import javax.persistence.*;

@Entity
public class Task extends Model {

  @Id
  public Long id;

  @Required
  public String label;

  public static Finder<Long,Task> find = new Finder(
    Long.class, Task.class
  );

  ...
We made the Task class extend the play.db.ebean.Model super class to have access to Play built-in Ebean helper. We also added proper persistence annotations, and created a find helper to initiate queries.
Let’s implement the CRUD operations:
public static List<Task> all() {
  return find.all();
}

public static void create(Task task) {
  task.save();
}

public static void delete(Long id) {
  find.ref(id).delete();
}
Now you can play again with the application, creating new tasks should work.
Note: Read more about Ebean.
§Deleting tasks
Now that we can create tasks, we need to be able to delete them. Very simple, we just need to finish the implementation of the deleteTask action:
public static Result deleteTask(Long id) {
  Task.delete(id);
  return redirect(routes.Application.tasks());
}
§Deploying to Heroku
All features are completed. It’s time to deploy our application in production. Let’s deploy it to heroku. First you have to create a Procfile for Heroku in the root application directory:
web: target/start -Dhttp.port=${PORT} -DapplyEvolutions.default=true -Ddb.default.url=${DATABASE_URL} -Ddb.default.driver=org.postgresql.Driver
Note: Read more about Deploying to Heroku.
Using system properties we override the application configuration when running on Heroku. But since heroku provides a PostgreSQL database we’ll have to add the required driver to our application dependencies.
Specify it into the project/Build.scala file:
val appDependencies = Seq(
  "postgresql" % "postgresql" % "8.4-702.jdbc4"
)
Note: Read more about Dependencies management.
Heroku uses git to deploy your application. Let’s initialize the git repository:
$ git init
$ git add .
$ git commit -m "init"
Now we can create the application on Heroku:
$ heroku create --stack cedar

Creating warm-frost-1289... done, stack is cedar
http://warm-1289.herokuapp.com/ | [email protected]:warm-1289.git
Git remote heroku added
And then deploy it using a simple git push heroku master:
$ git push heroku master

Counting objects: 34, done.
Delta compression using up to 8 threads.
Compressing objects: 100% (20/20), done.
Writing objects: 100% (34/34), 35.45 KiB, done.
Total 34 (delta 0), reused 0 (delta 0)

-----> Heroku receiving push
-----> Scala app detected
-----> Building app with sbt v0.11.0
-----> Running: sbt clean compile stage
       ...
-----> Discovering process types
       Procfile declares types -> web
-----> Compiled slug size is 46.3MB
-----> Launching... done, v5
       http://8044.herokuapp.com deployed to Heroku

To [email protected]:floating-lightning-8044.git
* [new branch]      master -> master
Heroku will build your application and deploy it to a node somewhere on the cloud. You can check the state of the application’s processes:
$ heroku ps

Process       State               Command
------------  ------------------  ----------------------
web.1         up for 10s          target/start
It’s started, you can now open it in your browser.
Your first application is now up and running in production!
Found an error in this documentation? The source code for this page can be found here. After reading the documentation guidelines, please feel free to contribute a pull request. Have questions or advice to share? Go to our community forums to start a conversation with the community.